

Let’s Stream! Part 6: OBS setup (EN)
This content is also available in Dutch, click here to switch
Last update we used Nvidia Shadowplay as a recording and streaming tool, together with our GeForce GTX 1060 build. Starting your game recordings really doesn’t get any easier than with Shadowplay, and it has almost no effect on system performance: if you can play a game on a certain setting, you can record it. However as an advanced live streaming tool we were left wanting a bit more. The settings are fairly limited and the quality of live streaming could be a a bit better. So for our high-end GeForce GTX 1080 Ti based system we turned towards a (semi-) pro streaming tool: OBS.
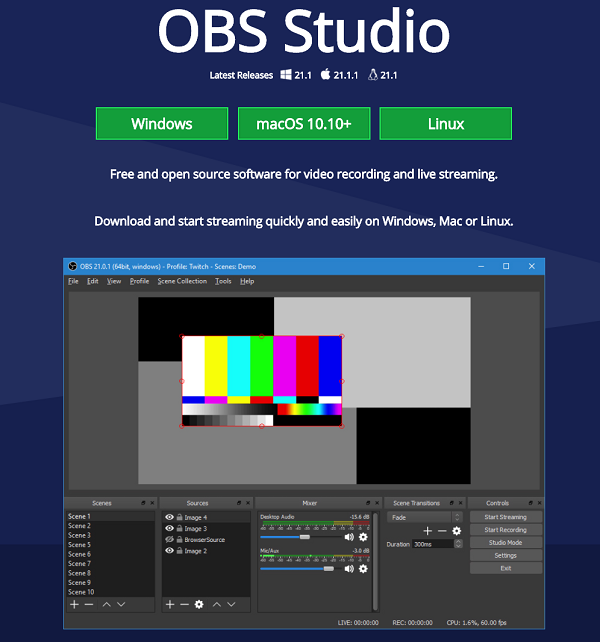
OBS is a trusted name for live streamers, known for its many options and no doubt the fact that its free helps a bit too. However many people look up to it as a complex, option-reach software package. In this part we want to show you that with only a few small tips it is actually surprisingly easy to start streaming with it. Unlike with Nvidia Shadowplay the performance impact on your pc is something to consider, so we’ll go in-depth on that in the next update on our streaming adventure. In this post we’ll start easy: we’ll start streaming our screen action, and add a webcam to it.
Installation
Start by downloading the OBS software from obsproject.com. Press ‘next’ a few times and pretend you actually read all the terms and conditions, and soon enough you’ll be looking at OBS on your desktop. If it offers auto configuration: skip that for now.
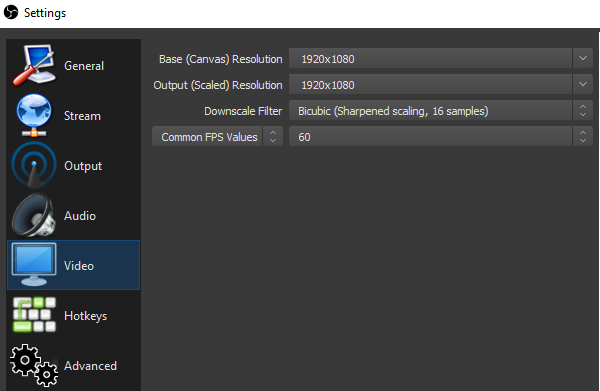
Help! Tons of buttons and options! Thankfully you can ignore most. Start by going to the ‘settings’ button in the lower right hand corner, and press the video tab. Change the base resolution to the resolution of your gaming monitor (default is 1920x1080p, and chances are that’s what you’re gaming on anyway). The output resolution is up to you: 1080p is great if you have a beefy system, but 720p or 940p are fine for most scenario’s. If you’re worried about your cpu performance, leaving it on 720p default is fine.
Since we want to stream FPS (First Person Shooters) games as well we will change the FPS (Frames per Second) to 60, but you can leave it on 30 if you play slower games. The default bicubic downscale filter is fine too; if you know you have a beefy system going for Lanczos is just a tad nicer.. Press apply, press ok.
Let’s add our screen to OBS. In the second large block in the bottom left (under ‘sources’) press the plus symbol, and select “Display Capture”
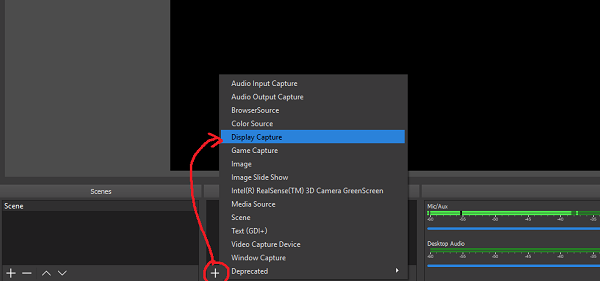
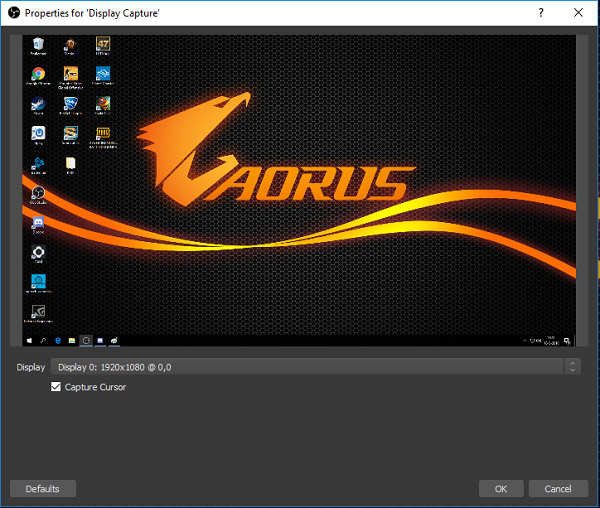
If you have multiple monitors, you’ll have to select which screen you will be gaming on (and thus streaming to viewers). Multiple monitors is not required, but it will make your life a lot easier. “Capture cursor” you can decide for yourself, generally leave it on unless you have specific reasons for it.
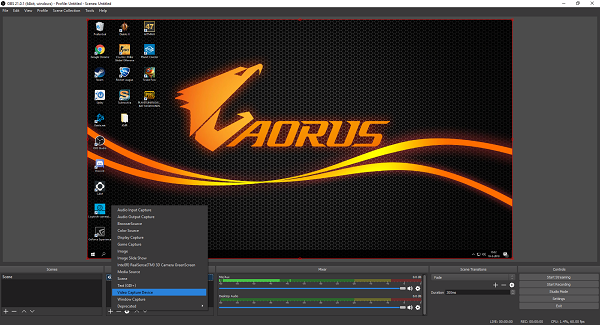
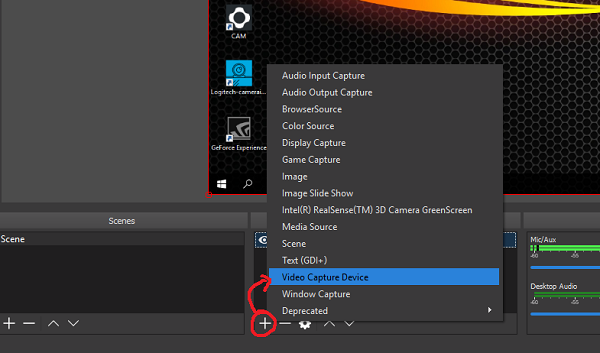
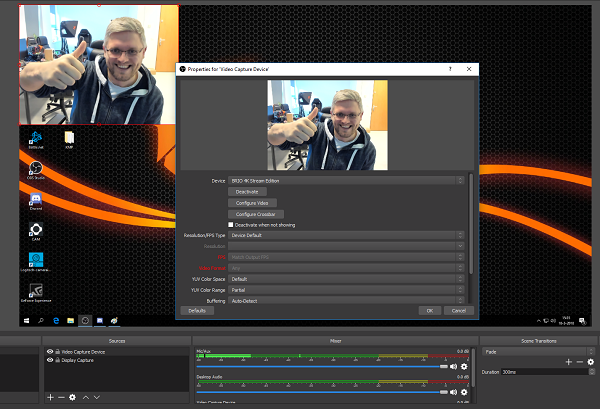
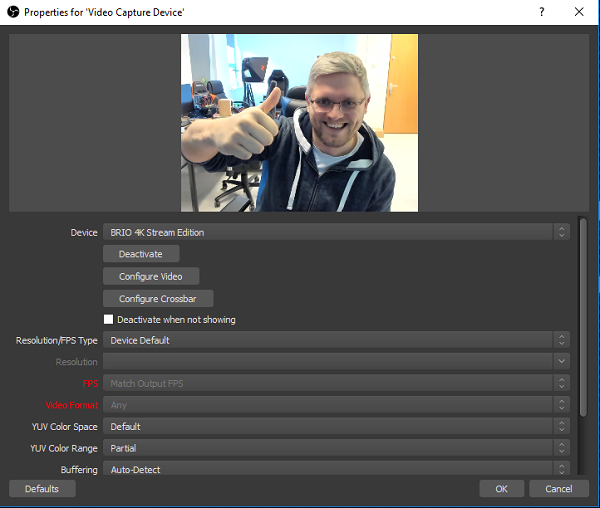
In the main OBS window you should now see your screen, this is what you’ll be streaming soon. But first let’s add our webcam. Press the little plus under sources again, add video capture device, and assuming your webcam is connected (in this case a Logitech Brio cam) you should see yourself. You can tweak some settings here if you want.
In the main OBS window you should now have your webcam window in one of the corners over your main display. You can now resize it and move it as you see fit. It’ll depend on the game you’ll be playing what a good spot is. You can save your layouts under ‘scenes’ and swap between them if you want.
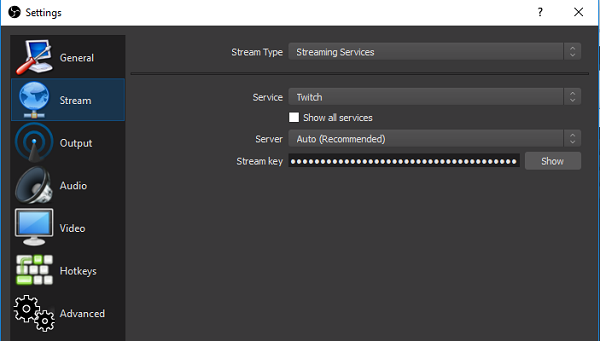
We’ve told OBS that we want to stream our screen, share our webcam, but we still need to tell it where to stream it to. Open settings again, go to the ‘stream’ tab, choose your favorite platform, and it will ask for your stream key. We use Twitch here, and you can find the key when you log into Twitch and open the Twitch Dashboard, but YouTube for example works in the same way. Copy/paste your key, and now OBS knows where to send your content.
Before we start our stream we do have to tweak a few details. Open the output tab in settings, and take a look at the settings we boxed in red. Make sure it says x264 as encoder, nd set the rate control to CBR (Constant Bit Rate).

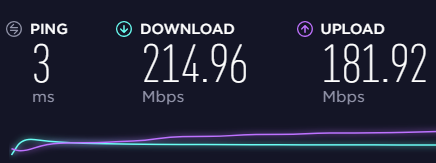
The bitrate you want to set will depend on your connection. Open an internet speedtest (we use speedtest.net), and take a look at your upload speed. Assuming you have a half decent connection, think 10 Mbps or more, simply set the bitrate to 5000 (5 Mbps). You can go a bit higher if you want (We use 6000 for a minor quality boost), but from 5000 it gets hard to see the benefit in stream quality.
If your upload speed is poor, you’ll have to limit the bitrate as well. Upload speeds of 5 Mbps can generally handle 3000 rated streams without suffering every time you open a webpage. If you’re in this situation it is important that you remember that you have a poor connection. For example family members using the internet might even affect your stream reliability. Even with a beefy computer you might want to consider lowering the stream quality elsewhere too, lowering the output resolution to 720p or 30 fps, allowing you to lower the bitrate while retaining ok picture quality.
On a solid internet connection these settings are pretty easy to set once and forget. On a poor connection you’ll simply have to go by trial and error to see what works for you; if your stream isn’t reliable, you’ll have to lower the settings.
The last setting we highlighted is the “CPU usage preset”. OBS offers a massive list of options, but many are not worth considering for streamers. Anything slower than “fast” for example only benefits quality a tiny amount while still affecting system performance. OBS defaults to ‘veryfast’, and we say that’s a good place to start. If you know you have performance to spare we suggest dropping it to ‘faster’, but ultimately it will come down to specific games and computers as to what will work well. We suggest just leaving it ‘veryfast’and seeing where it gets you before worrying about it.
Thankfully OBS has a CPU load meter in the bottom right of the application, so if that warns you that your CPU is having problems you know you need to adjust some settings. If you see your CPU frequently near 100% load the first thing you’ll want to do is change that CPU usage preset, it’s worth changing this to superfast before changing things like bitrate and resolution.
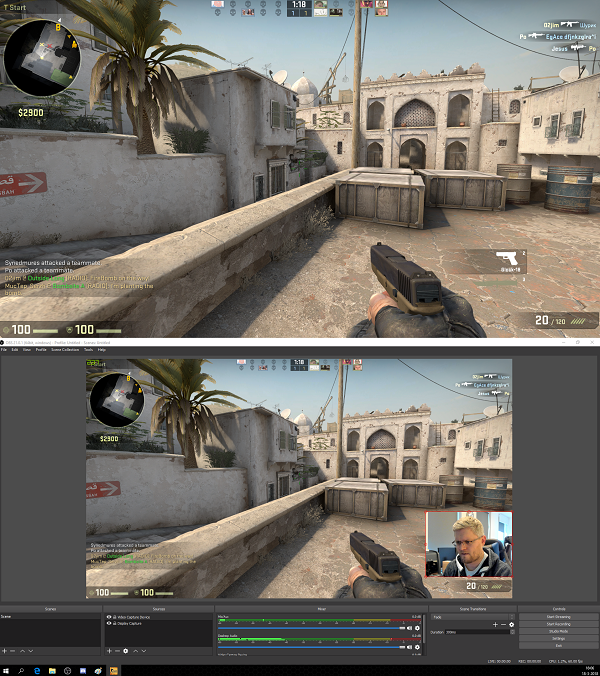
But that’s it for now, save the settings, load up your game, and press ‘start streaming’ in the bottom right! We boot up CS:GO, move our webcam a bit up just above our ammo info (left side above the chat is a nice spot too), and off we go. Top half of the screenshot is my game screen, bottom half is the OBS window.
Stepping it up
The OBS basics are pretty simple, but soon enough you’ll find yourself wanting even more. Thankfully OBS does have a ton of options, so there are a million things you can do to improve your stream. We won’t go into a ton of detail here now, we primarily wanted to show you that it is actually really easy to get started, but we’ll touch on a few possible next steps:
You can start by adding more video and audio sources, we added another webcam for example. The fact OBS streams desktop audio by default, that means everything you hear will be streamed, is very handy. This means that for example discord audio is in automatically unless you change it which is nice, so if you’re playing solo or coop with friends online there isn’t much reason to change anything. Adding overlays with different interesting (or just fun) extra’s is the logical next step, we suggest taking a look at “Streamlabs” for some options.
The scenes function is also great, you find that bottom left corner in OBS. This allows you to save different stream layouts which you can swap between. Add a few handy keyboard shortcuts to manage them and you’ll have a serious production look going on in no time.
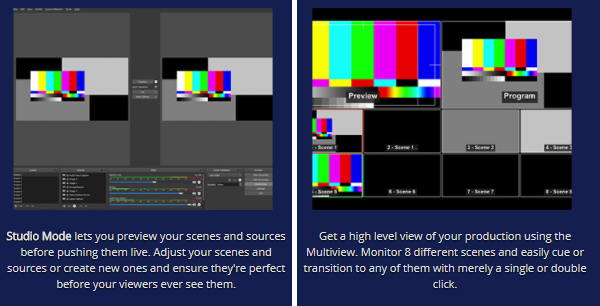
In multiview you can then preview your possible scenes, add nice transitions between them, and so on. Of course by the time you get to this point you’ll be comfortable enough with OBS not to worry about it (and possibly be working with a dedicated streaming rig), so if it seems like a lot of work now just ignore it for the time being. Keep in mind some of the most popular streamers do nothing more but play their game while talking to you, the hard part is to make interesting content, not the physical act of streaming.
It is worth pointing out the record button next to the streaming button, allowing you to make file recordings of your gameplay in the same way. Like we mentioned in the introduction: if you’re just concerned about capturing gameplay footage the Nvidia Shadowplay software built into the drivers for your GPU is more than enough for that, and less effort for your system, but OBS obviously gives you more options.
Conclusion
Starting your stream with OBS really isn’t hard at all, but that’s not to say streaming itself is easy. We wanted to show you that you can start streaming as long as you have a decent pc and a few minutes to set it up, but it’s still up to you to make sure you’re making interesting content. Just be sure to set yourself realistic goals when you get going, and start by making it fun for yourself. Start gaming with your friends, family, or others around you, and all the rest (viewers, complex overlays, detail tweaks) will come eventually.
Considering how much OBS has to offer beyond the basic start we’d say learn from others and see what you find interesting to add. Just don’t worry about having your stream look like DrDisrespect on the first day 😉 (Although admittedly, the mustache has some appeal). Just have fun, share your best gaming moments with others, and the rest will come.
Is OBS perfect? Well, no. It’s easy enough, it offers tons of ways to grow, but it does affect your system performance much more than the Shadowplay feature from the last part, especially if you want to game and stream on the same system. In the next part we’ll go in-depth on the performance topic, looking at what kind of pc you want or need for a decent OBS setup, and what you should considering when building a new gaming/streaming rig.
Overview of all “Let’s Stream” articles:
Part 1: Introduction
Part 2: Building a mid-range Game PC
Part 3: Building a high-end Game PC
Part 4: Let’s Game: Performance baseline for streaming
Part 5: Recording and streaming with Nvidia Shadowplay
Part 6: Recording and streaming with OBS